Installation
Mission Control can be built from source as well as installed as a dynamically and statically linked binary. The For Development Subsection describes how the application can be installed for development purposes.
We also provide a pre-built application image which does not require any installation. These can be downloaded here. <TODO INSERT LINK>
For Development
Step:1 : Download and Install Qt
Please download any version of Qt >= 5.15 from here: Qt Download Page. Also install the latest version of Qt Creator which will be bundled with the Qt installer. If you are using the online installer Qt will download a .run file on your system. To run open a terminal in the download file location and run:
chmod a+x qt_installer.run
./qt_installer.run
Step:2 : Download and Setup ArcGIS
To compile and effectively use the Mission Control we also need to setup ArcGIS. Download ArcGIS 100.8. You might need a developer account to download the setup. Please create one here.
Once logged in, download ArcGIS 100.8 for your specific OS.
Alternatively, the Linux ArcGIS 100.8 installation file can also be accessed on G-Drive.
Extract the tar.gz using the following command:
tar -xf ArcGIS_Runtime_SDK_Qt_Linux64_100_8_0.tar.gz
from the extracted directory run:
./Setup
Follow the instructions to install ArcGIS. For the post installer select the following:
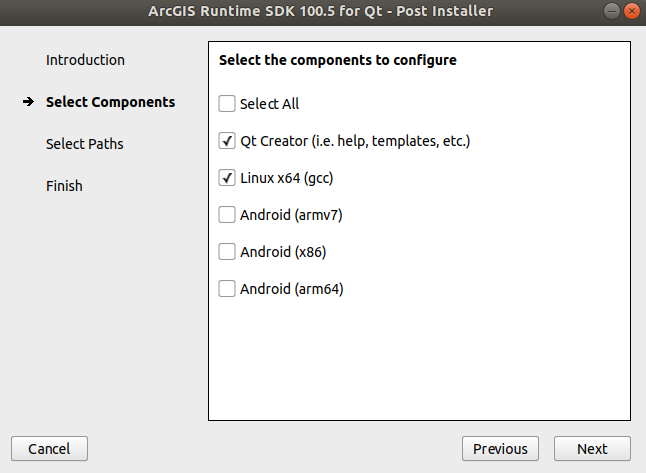
Enter the location of Qt Creator and qmake binaries from your system. Note: Qt Creator is generally located in /home/user/Qt/Tools/QtCreator/bin/qtcreator.

Step:3 : Download Mission Control
You can clone the Mission Control Application using:
git clone https://ascl3.ece.vt.edu/avl/user-interface/avl_mission_control
Setup:4 : Setup Mission Control using Qt
Open the QtCreator, From File, select Open a project, navigate to the cloned mission control folder and select the avl_mission_control.pro file. Configure the file with desktop setting in Qt.
Build (Ctrl + B) and Run (Ctrl + R)